How to issue an AREC
Go to AREC Issuance.
To issue an AREC, you need to be running one or more miners, and have already generated some renewable energy.
Please refer to Order Miners to order miners if you have not yet already done so.
If you have already generated some renewable energy, well done! Go visiting Arkreen AREC Dapp to start issuing your own AREC NFT.
Please follow the steps to issue your AREC:
Step 1. Visit the AREC Dapp, and connect your wallet
Step 2. Visit the AREC Issuance page
On PC: Click the Issuance item in the left navigation bar.
On smartphone: Select the Issuance item under the AREC top menu.
On the AREC Issuance page, your current status of generating renewable energy will be shown.
Step 3. Select the End AREC Date
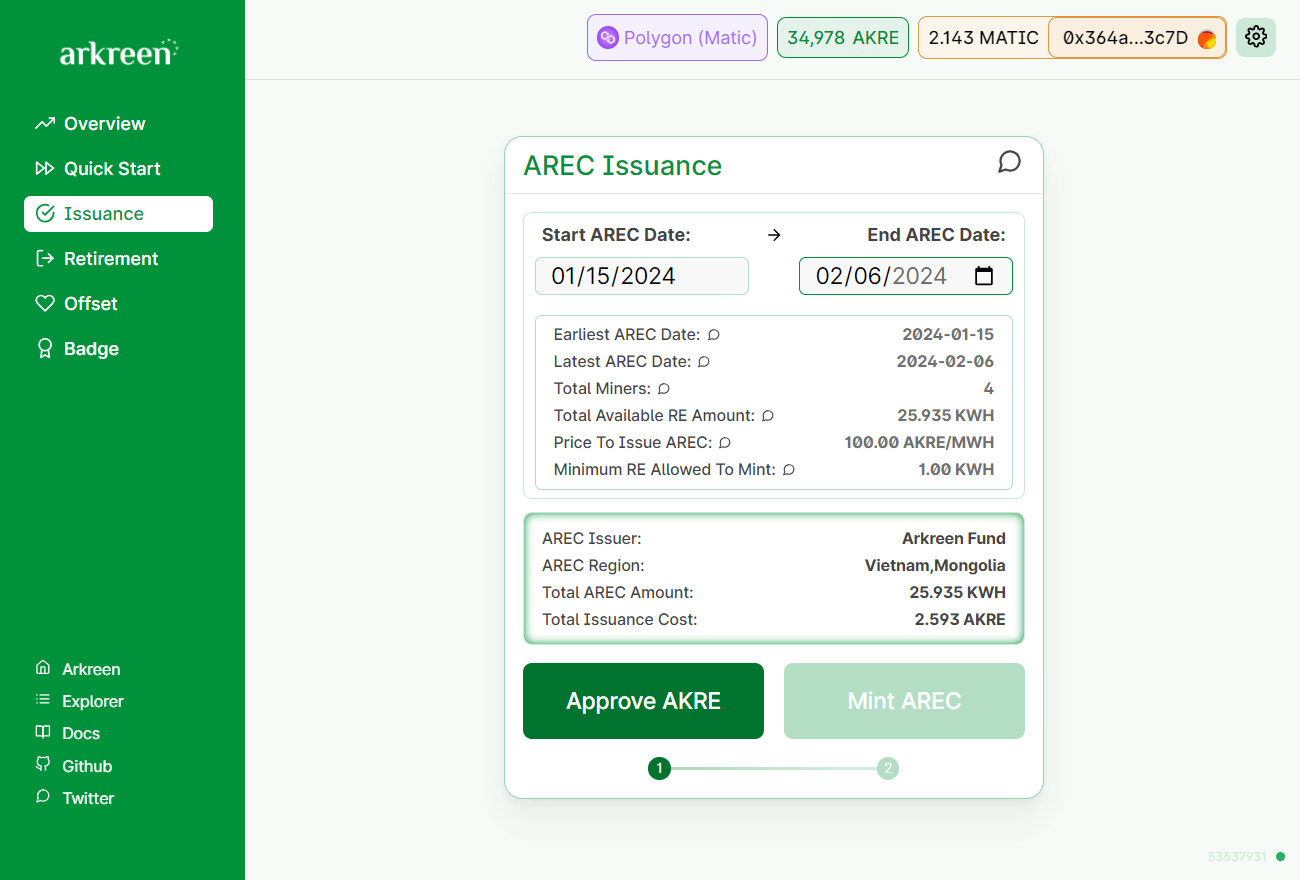
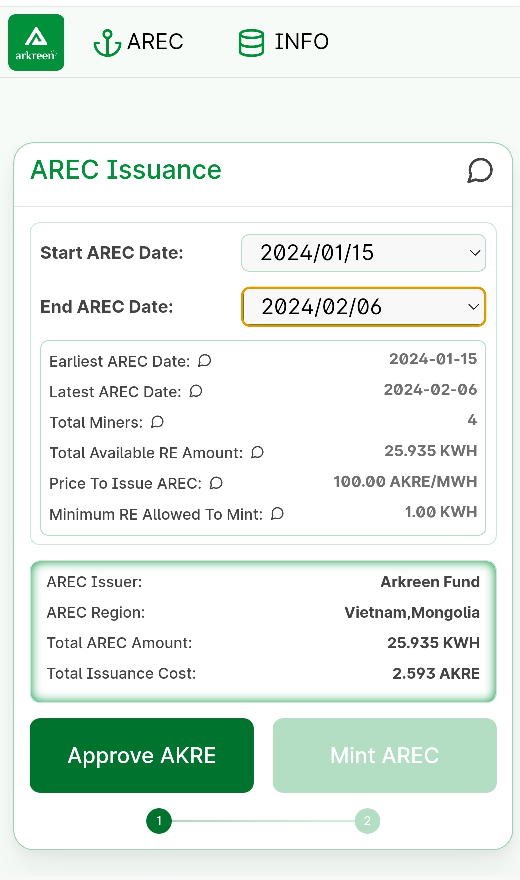
On the AREC Issuance page, select the End AREC Date you want to issue your AREC. Once the End AREC Date is selected, the information of the AREC to be issued will be displayed.
Start AREC Date: This is the earliest date you participated in the Arkreen mining, ie, generating solar energy and getting rewards from the Arkreen Network. If you have ever issued an AREC before, this is the date just after the End AREC Date in that AREC.
End AREC Date: This is the last date your RE generation data can be used to issue an AREC. Normally this should occur 2 or 3 days before the current date(subject to your time zone). Please select a date before this end date to issue your AREC.
Earliest AREC Date: This is the earliest date your renewable energy output is available to mint the AREC NFT. It is usually the same as Start AREC Date.
Latest AREC Date: This is the last date your renewable energy output can be minted as an AREC NFT, i.e. the End AREC Date that is selected to issue your AREC.
Total Miners: This represents the number of the miners you are holding.
Total Available RE Amount: Total renewable energy amount available for minting an AREC NFT, based on the End AREC Date you selected.
Price To Issue AREC: AKRE tokens are needed to issue AREC. This price is used to calculate how much total AKRE needs to be paid. This price is subject to change related to Arkreen governance rules.
Minimum RE Allowed To Mint: If renewable energy is less than this stated amount, then Miners are not allowed to mint AREC NFT.
AREC Issuer: This is the name of the AREC issuer. Currently only Arkreen Foundation generated ARECs are supported, however, other third-party issuers may be added later.
AREC Region: The region where the RE are generated. If you have multiple miners with different regions, these regions will be concatenated together in the issued AREC.
Total AREC Amount: Total amount of renewable energy you just selected to issue the AREC.
Total Issuance Cost: The cost you need to pay for issuing the AREC, which maybe in AKRE or USDC.
Step 4. Approve to pay the AREC issuance fee
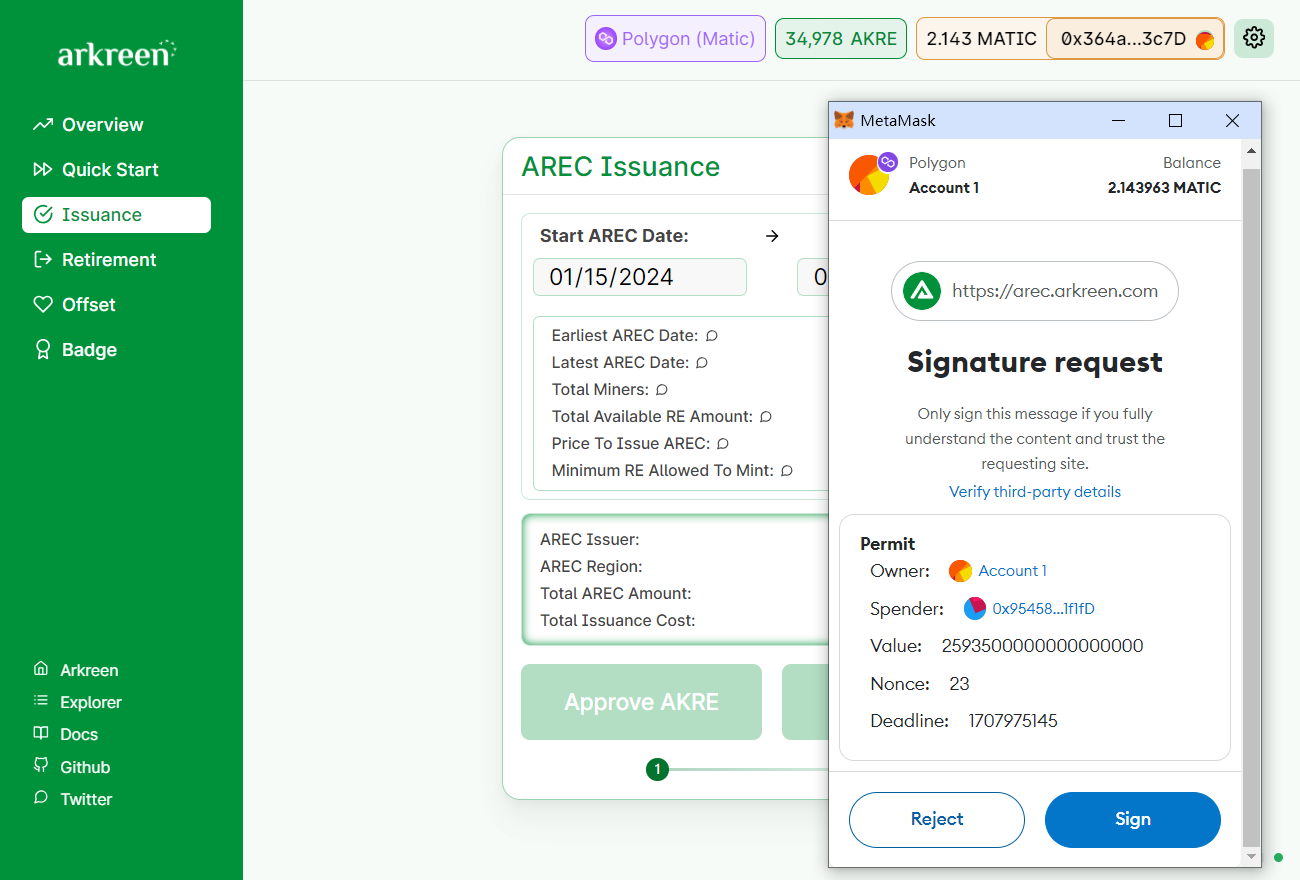
Check all the AREC issuance information. If you are satisfied with the new AREC to issue, please click Approve AKRE to approve the AREC issuance fee paid from your wallet.
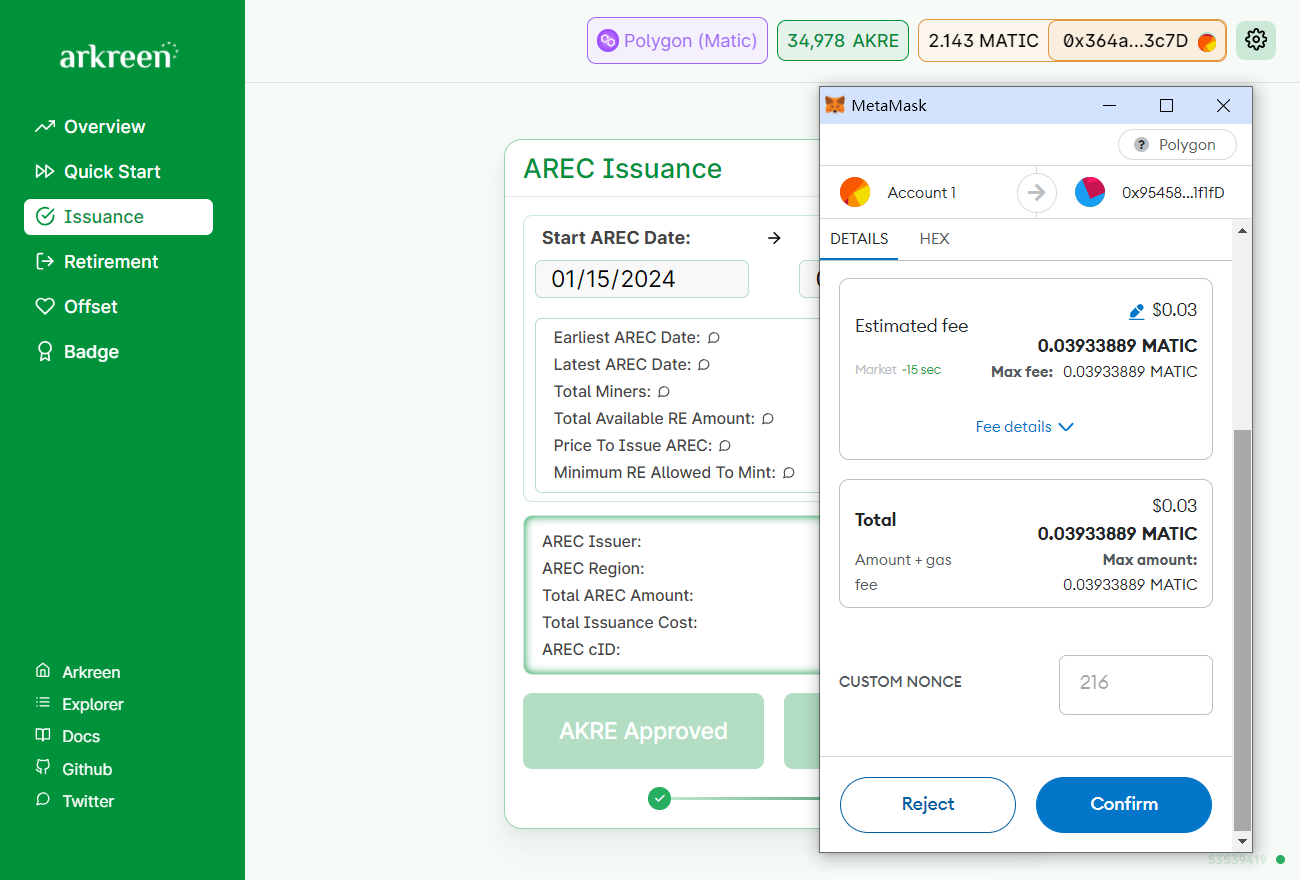
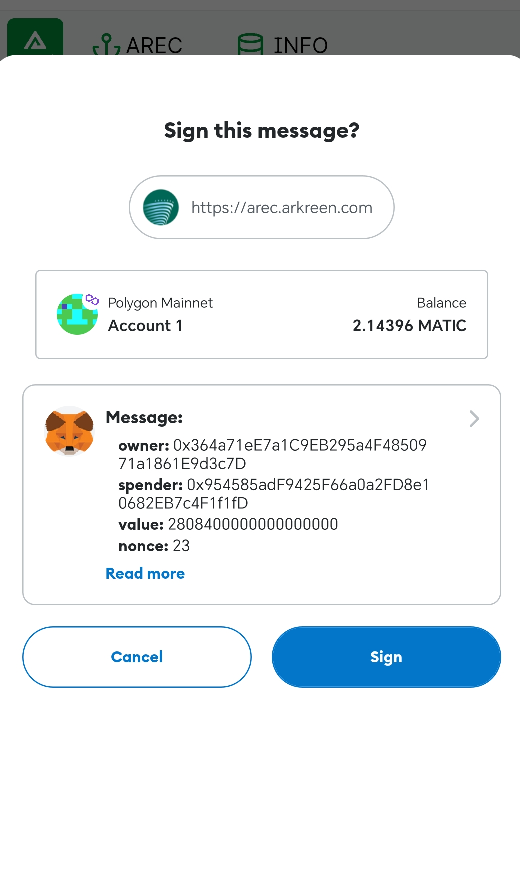
This launches Metamask to verify and sign the approval information. Please check the information carefully for errors, and if no error is found, click the Sign button to confirm your approval.
This step does not send a transaction to the blockchain. It is just a "Permit" meta-transaction to approve paying the issuance fee.
Step 5. Request to issue the AREC
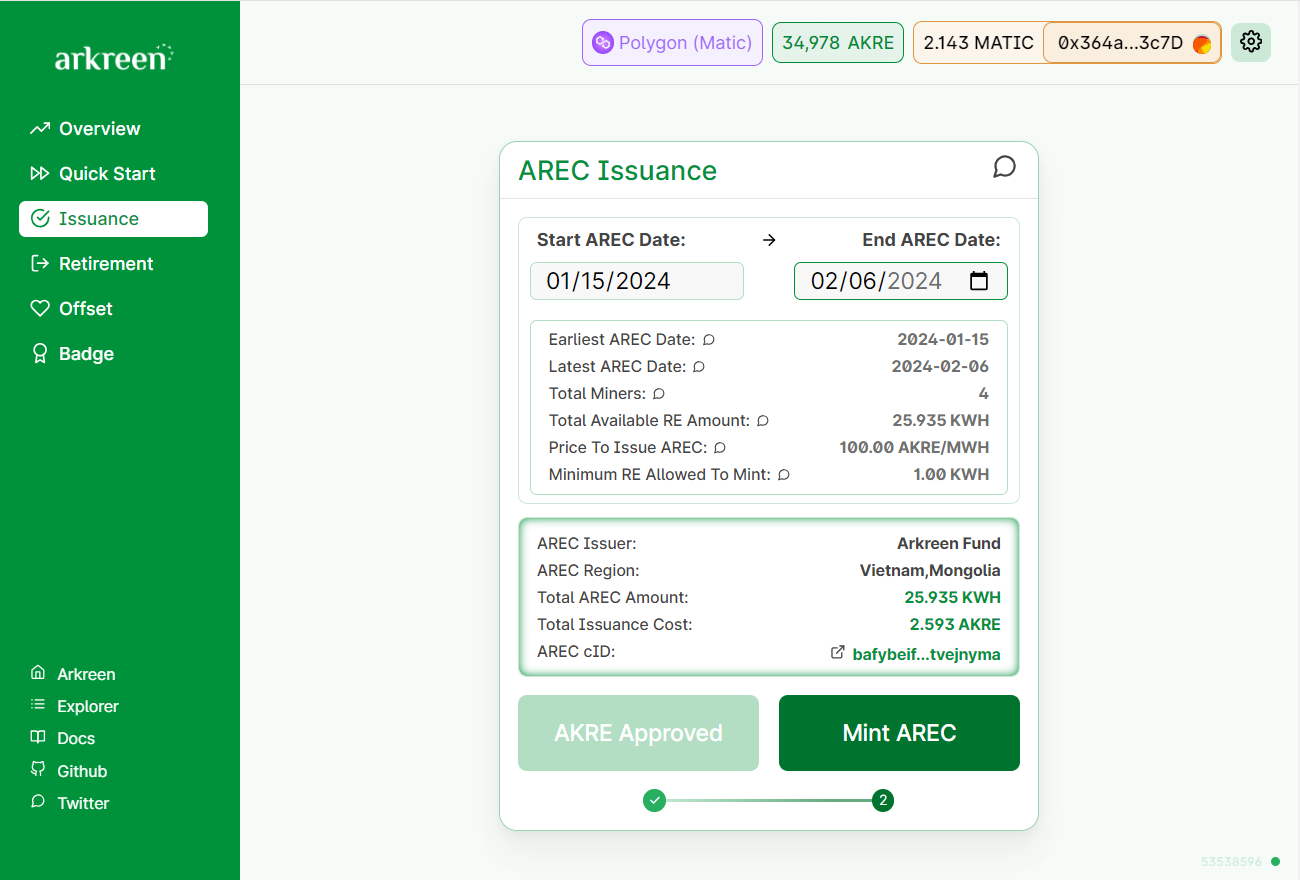
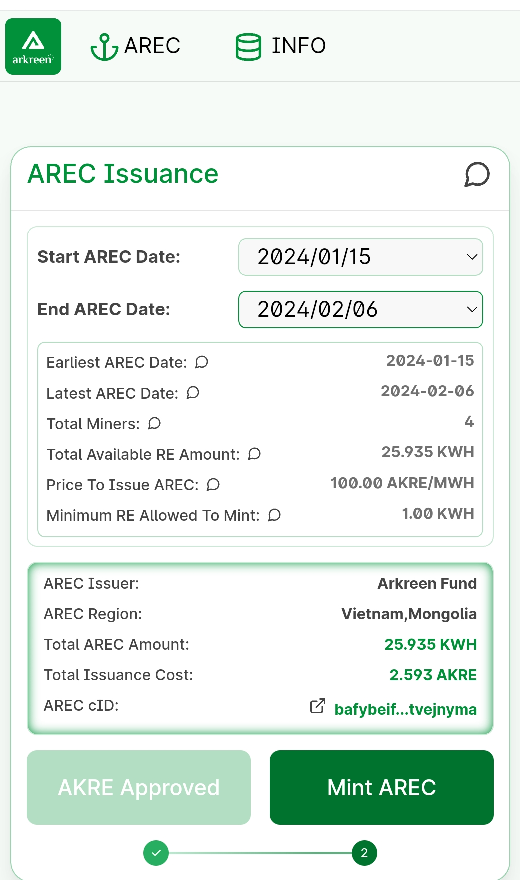
Once you have approved payment of the AREC issuance fee, the AREC Dapp will send your approval message to the Arkreen Network to request issuing your AREC. Arkreen Network will check your payment approval, and many other related information. While the checking is finished and passed, your AREC RE generation data will be packed and stored into IPFS storage, and the CID corresponding to your AREC will be generated. The CID is returned to the AREC Dapp and shown within the Dapp.
infoCID is the identifier of the content in IPFS, which can be used to address the distributed files.
The process of creating the CID could take up to 15-20 seconds, your patience in this duration is greatly appreciated. Once the CID becomes available, review the AREC RE data by clicking on the link beside the CID.Once the CID is ready, the button Mint AREC will become activated, allowing you to click the Mint AREC to request your AREC NFT.
Step 6. Waiting the AREC issuance be confirmed
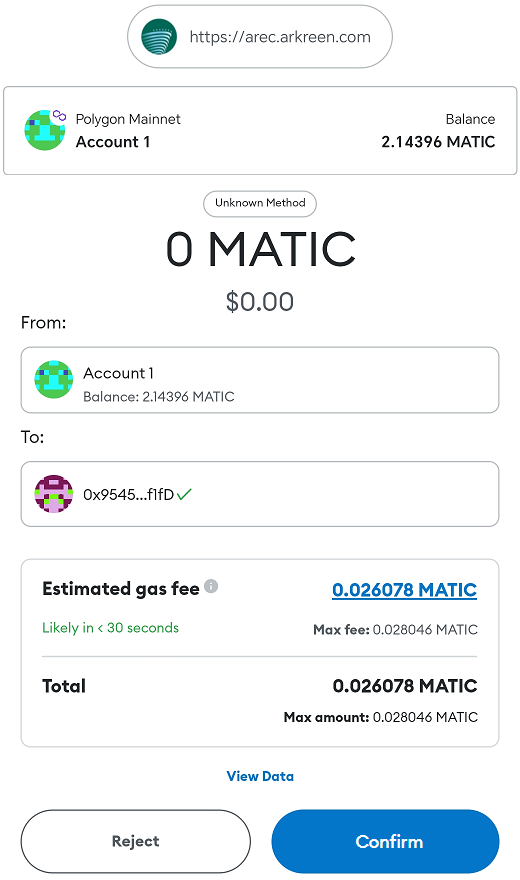
While you click Mint AREC, MetaMask will launch and request to sign the AREC issuance transaction. Check all the transaction information in detail, if everything is correct, click the button Confirm to sign the transaction.
Wait a few seconds for the transaction to be recorded on the blockchain after signing it.
Once your AREC request transaction has been on-chain, your AREC NFT will be minted, but it is still in the Pending state. Arkreen Network will verify the on-chain information associated with this AREC as well as the RE generation data referred to by the AREC CID. After the verification process has cleared, Arkreen, as the AREC issuer, will confirm the AREC's issuance by submitting a Confirm transaction on-chain. At this point, the AREC has been successfully issued.
infoThe verification process could just take several minutes, but could also extend to a few days to allow the Arkreen Network to check the AREC issuance information before the AREC is finally confirmed. Thanks for your patience during this process.
noteArkreen Network could Reject the AREC issuance in case something is wrong during the issuance checking.
